


What is Git ?
Git is the free and open source distributed version control system that's responsible for everything GitHub related that happens locally on your computer. This cheat sheet features the most important and commonly used Git commands for easy reference.
- Easy setup
- Collaboration friendly
- Fast
- Open source
Understanding Version Control
Version control, also known as source control, is the technique of tracking and managing changes to codes and these are the systems that are software tools that enable software teams to manage modifications to source code as time passes.
What is GitHub?
GitHub is a widely-used Free-to-use cloud Storage platform with version control and many other essential features that specifically helps developers to manage and deploy their projects on GitHub.
Installation
With platform specific installers for Git, GitHub also provides the ease of staying up-to-date with the latest releases of the command line tool while providing a graphical user interface for day-to-day interaction, review, and repository synchronization.
Download the latest version of Git for Windows
- Step 1: Extract and Launch Git Installer
- Step 2: Go to your download location and double-click the file to launch the installer.
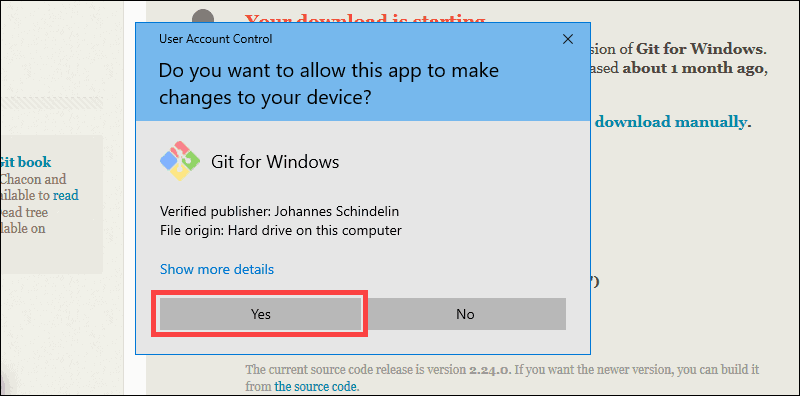
- Step 3: Allow the app to modify your device by selecting Yes in the User Account Control window that appears.
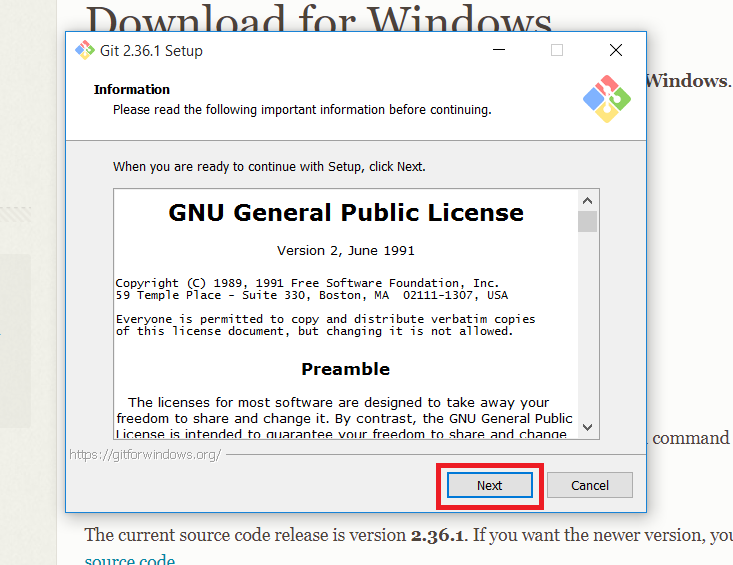
- Step 4: Check the GNU General Public License and click Next.
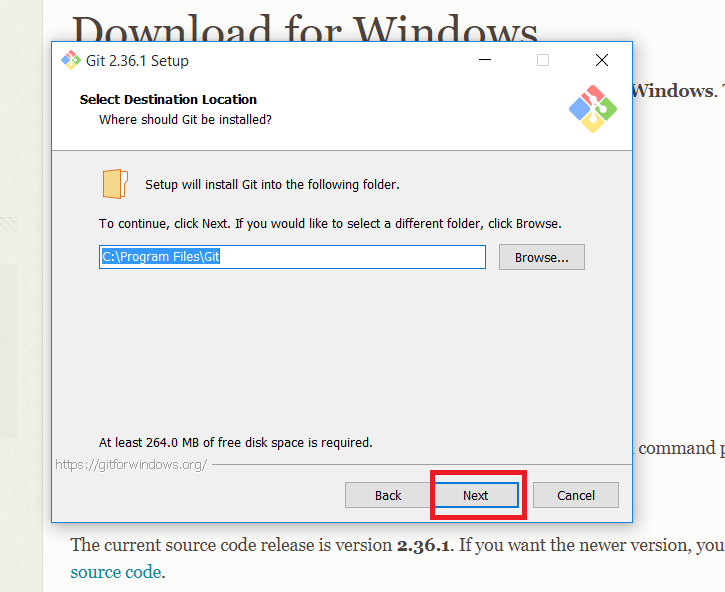
- Step 5: Select the install location. If you don’t have a reason to modify it, leave it to default and click Next.
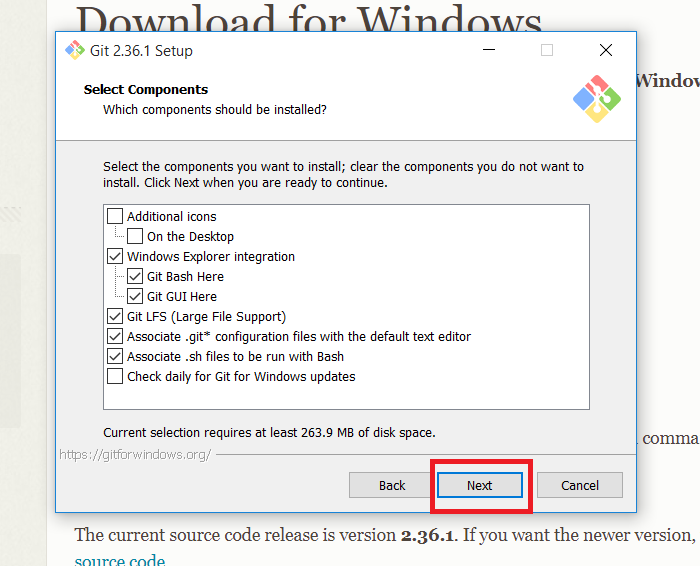
- Step 6: A screen for component selection will display. Leave the settings as it is and click Next.
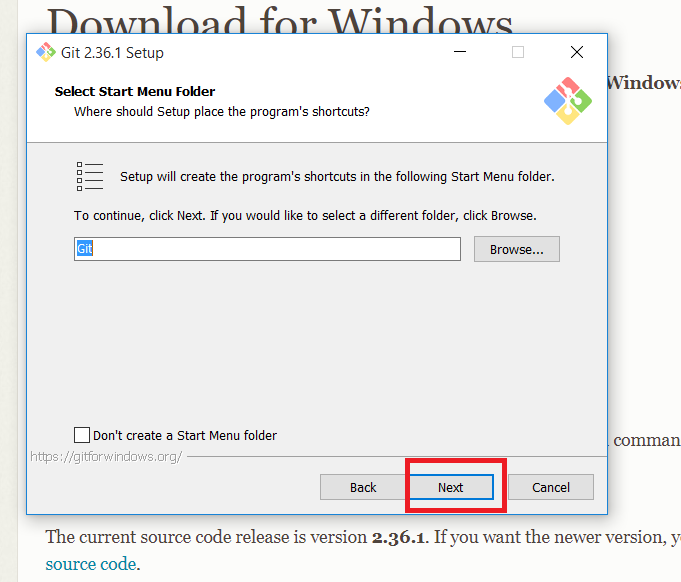
- Step 7: The installer asks you to create a start menu folder. Simply click Next.
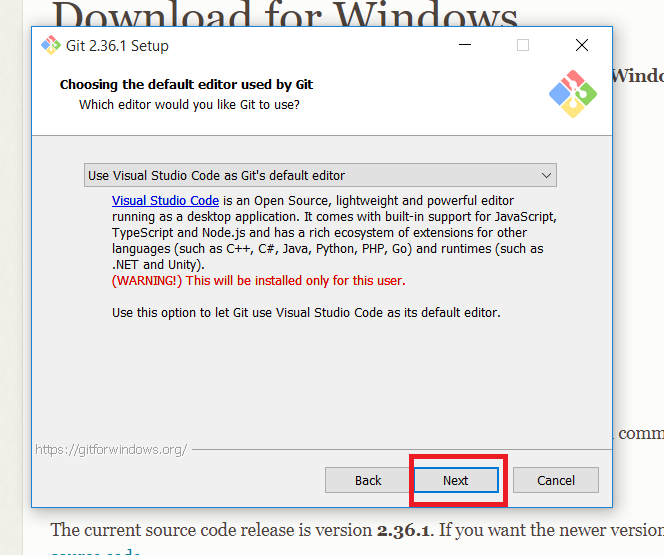
- Step 8: Choose the text editor you want to use with Git and click Next.
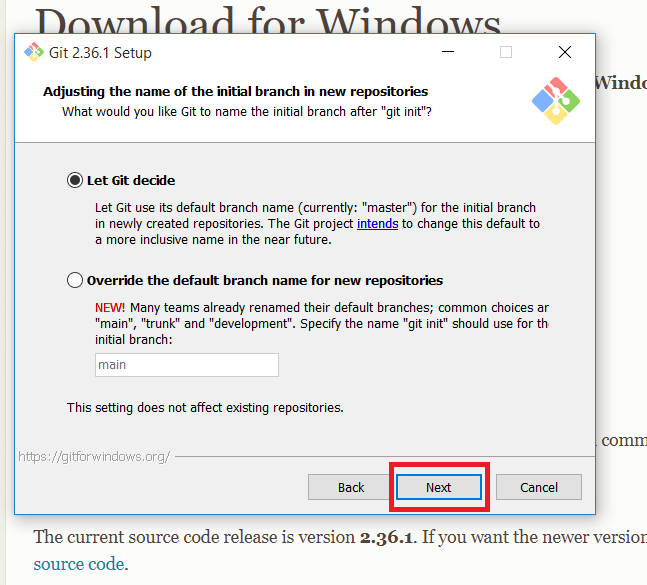
- Step 9: The following step allows you to give your original branch a new name. ‘Master’ is the default. Leave the default choice selected and press the Next button.
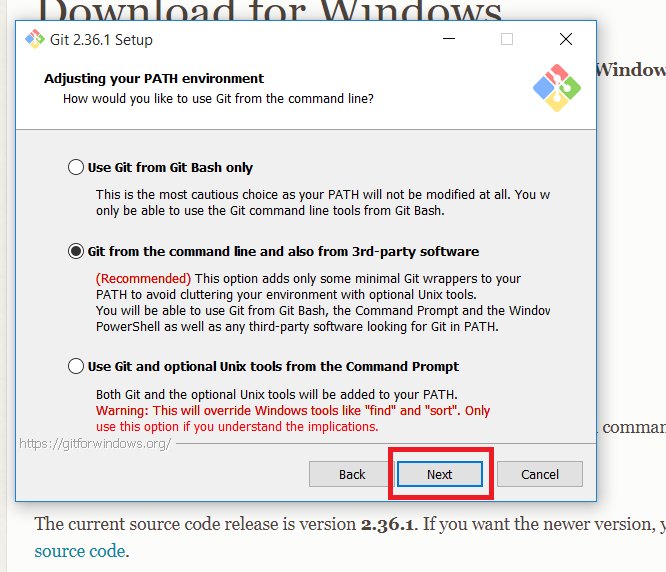
- Step 10: You can adjust the PATH environment during this installation phase. When you run a command from the command line, the PATH is the default set of folders that are included. Continue by selecting the middle (recommended) option and clicking Next.
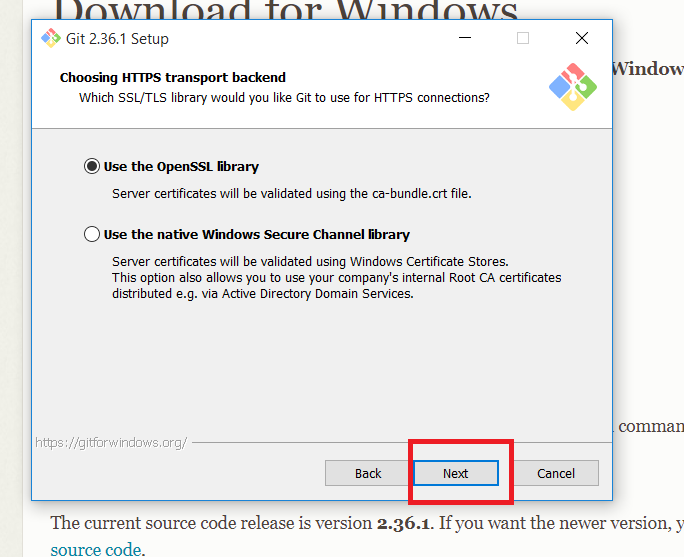
- Step 11: The following option concerns server certificates. The default choice is used by the majority of users. Simply click Next.
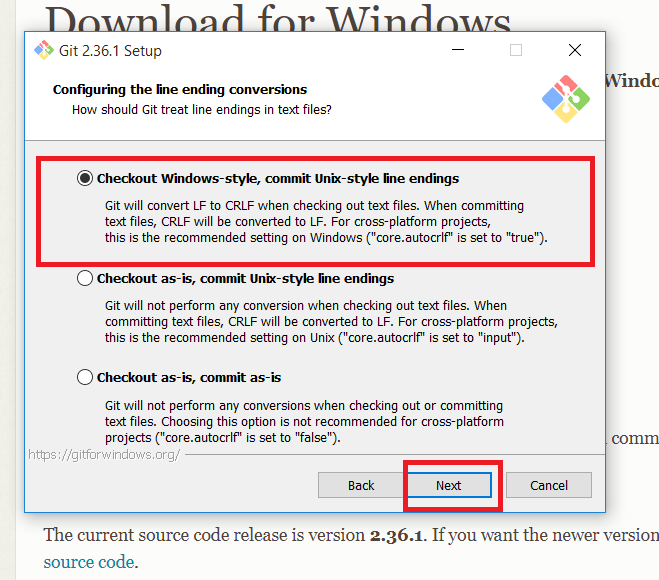
- Step 12: This step deals with how data is structured, and altering this option may create issues. So, it is advised to leave the default selection.
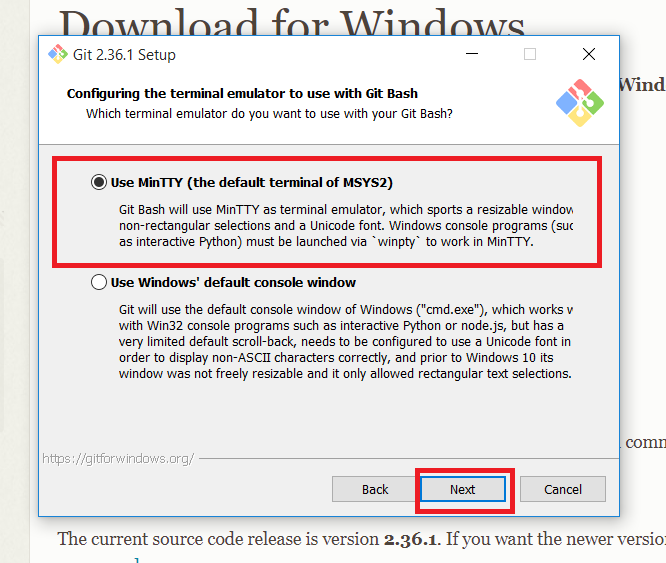
- Step 13: Select the terminal emulator that you wish to use. Because of its features, the default MinTTY is suggested. Click Next.
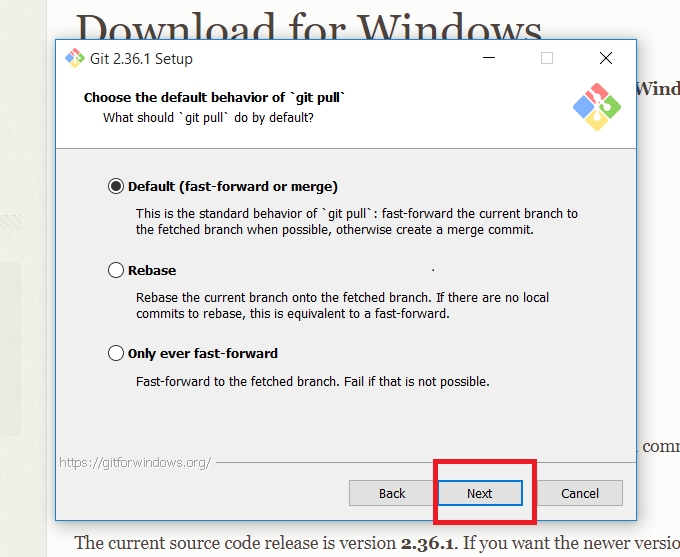
- Step 14: The installer now prompts you to specify what the git pull command should perform. Leave the default selected option and click Next.
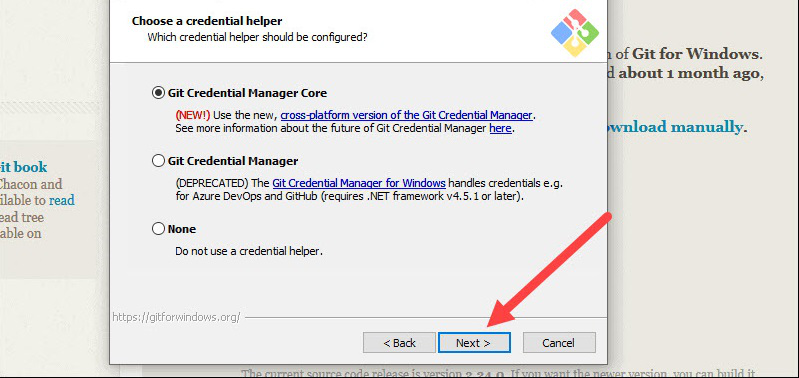
- Step 15: The next step is to decide which credential helper to employ. Credential helpers are used by Git to retrieve or save credentials. Leave the default selection and click Next.
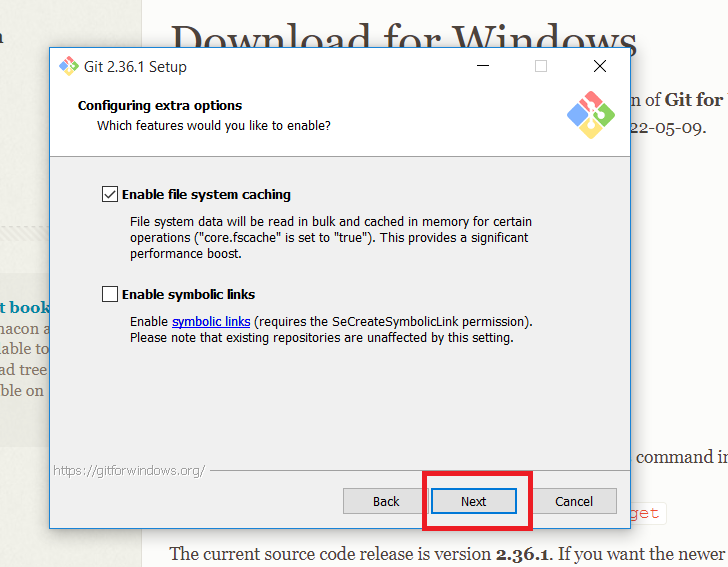
- Step 16: Although the default choices are suggested, this step allows you to select which additional features to activate.
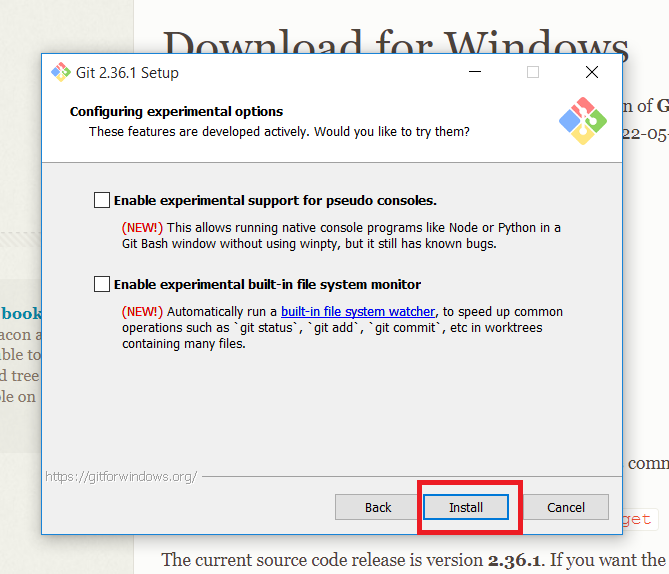
- Step 17: Git offers to install some experimental features. Leave them unchecked and click Install.
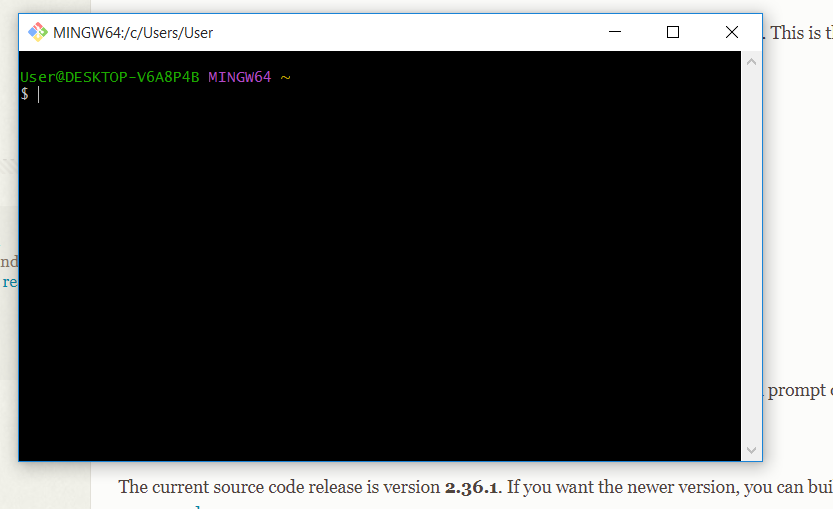
- Step 18: Once the installation is complete, launch the Git bash.
Benefits of Using Git
- History Tracking: Git allows you to track every change made in your project, including: who made the change and when it was made.
- Collaboration: Multiple developers can be able work on the same project at the same time, and Git efficiently manages the merging of changes in code.
- Branching and Merging: Git enables developers to create branches to work on new features or bug fixes and later merge them back into the main codebase.
- Offline Work: Git works offline, which means you can commit changes and work on your project even without an internet connection.
Initializing a Repository
Here are the Git initializing a repository commands:
- Initializes a new Git repository in the current directory.
- Creates a new Git repository in the specified directory.
- this Clones a repository from a remote server to your local machine.
- Clones a specific branch from a repository.
git initgit init [directory]git clone [url]git clone -b [branch] [url]Basic Git Commands
Here are some basic Git commands:
- Adds a specific file to the staging area.
- Adds all modified and new files to the staging area.
- Shows the current state of your repository, including tracked and untracked files, modified files, and branch information.
- Displays ignored files in addition to the regular status output.
- Shows the changes between the working directory and the staging area (index).
- Displays the differences between two commits.
- Displays the changes between the staging area (index) and the last commit.
- Display the difference between the current directory and the last commit
- Creates a new commit with the changes in the staging area and opens the default text editor for adding a commit message.
- Creates a new commit with the changes in the staging area and specifies the commit message inline.
- Commits all modified and deleted files in the repository without explicitly using git add to stage the changes.
- Creates a new note and associates it with an object (commit, tag, etc.).
- Restores the file in the working directory to its state in the last commit.
- Moves the branch pointer to a specified commit, resetting the staging area and the working directory to match the specified commit.
- Moves the branch pointer to a specified commit, preserving the changes in the staging area and the working directory.
- Moves the branch pointer to a specified commit, discarding all changes in the staging area and the working directory, effectively resetting the repository to the specified commit.
- Removes a file from both the working directory and the repository, staging the deletion.
- Moves or renames a file or directory in your Git repository.
git add <file>git add .git statusgit status -ugit diffgit diff [commit] [commit]git diff --stagedgit diff HEADgit commitgit commit -m "message"git commit -agit notes add -m "note"git restore <file>git reset [commit]git reset --soft [commit]git reset --hard [commit]git rm <file>git mv <source> <destination>Git Commit (Updated Commands)
Here are some of the updated commands for Git commit:
- Create a new commit in a Git repository with a specific message to indicate a new feature commit in the repository.
- Create a new commit in a Git repository with a specific message to fix the bugs in codebases
- Create a new commit in a Git repository with a specific message to show routine tasks or maintenance.
- Create a new commit in a Git repository with a specific message to change the code base and improve the structure.
- Create a new commit in a Git repository with a specific message to change the documentation.
- Create a new commit in a Git repository with a specific message to change the styling and formatting of the codebase.
- Create a new commit in a Git repository with a specific message to indicate test-related changes.
- Create a new commit in a Git repository with a specific message to indicate performance-related changes.
- Create a new commit in a Git repository with a specific message to indicate the continuous integration (CI) system-related changes.
- Create a new commit in a Git repository with a specific message to indicate the changes related to the build process.
- Create a new commit in a Git repository with a specific message to indicate the changes related to revert a previous commit.
git commit -m "feat: message"git commit -m "fix: message"git commit -m "chore: message"git commit -m "refactor: message"git commit -m "docs: message"git commit -m "style: message"git commit -m "test: message"git commit -m "perf: message"git commit -m "ci: message"git commit -m "build: message"git commit -m "revert: message"Branching and Merging
Here are some branching and merging commands:
- Lists all branches in the repository.
- Creates a new branch with the specified name.
- Deletes the specified branch.
- Lists all local and remote branches.
- Lists all remote branches.
- Switches to the specified branch.
- Creates a new branch and switches to it.
- Discards changes made to the specified file and revert it to the version in the last commit.
- Merges the specified branch into the current branch.
- Displays the commit history of the current branch.
- Displays the commit history of the specified branch.
- Displays the commit history of a file, including its renames.
- Displays the commit history of all branches.
- Stashes the changes in the working directory, allowing you to switch to a different branch or commit without committing the changes.
- Lists all stashes in the repository.
git branchgit branch <branch>git branch -d <branch>git branch -agit branch -rgit checkout <branch>git checkout -b <branch>git checkout -- <file>git merge <branch>git loggit log <branch>git log --follow <file>git log --allgit stashgit stash listRemote Repositories
Here are some remote repository commands:
- Retrieves change from a remote repository, including new branches and commit.
- Retrieves change from the specified remote repository.
- Fetches changes from the remote repository and merges them into the current branch.
- Fetches changes from the specified remote repository and merges them into the current branch.
- Pushes local commits to the remote repository.
- Pushes local commits to the specified remote repository.
- Pushes local commits to the specified branch of the remote repository.
- Pushes all branches to the remote repository.
- Lists all remote repositories.
- Adds a new remote repository with the specified name and URL.
git fetchgit fetch <remote>git pullgit pull <remote>git pushgit push <remote>git push <remote> <branch>git push --allgit remotegit remote add <name> <url>Git Comparison
Here are some Git comparison commands:
- Shows the details of a specific commit, including its changes.
- Shows the details of the specified commit, including its changes.
git show <commit>git show <commit> --name-onlyConclusion
In conclusion, This Git Cheat Sheet is thoughtfully organized and categorized, making it easy for developers to quickly find the commands they need for specific use cases. Whether it’s configuring and setting up Git, creating and managing projects, taking snapshots, branching and merging, sharing and updating, comparing changes, or managing version history, the Git Cheat Sheet covers it all.
By utilizing this resource, developers can enhance their productivity and efficiency in working with Git, ultimately leading to smoother and more successful software development projects.